When it comes to commercial, industrial, or high-end residential roofing, stone-coated metal roof tiles offer an unmatched combination of durability, aesthetics, and long-term cost efficiency. However, the performance and longevity of these premium roofing systems depend heavily on proper installation techniques.
At ROOFGLORY, our factory in Linyi, Shandong, China, produces high-quality stone-coated metal roof tiles for B2B clients who demand precision, reliability, and aesthetics. This guide explores everything you need to know about installing stone-coated metal roof tiles, including preparation, materials, installation steps, common challenges, and best practices.
Understanding Stone-Coated Metal Roof Tiles
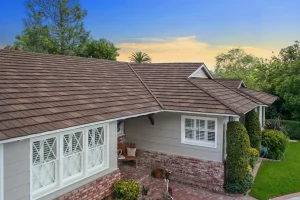
Stone-coated metal roof tiles are manufactured using steel coated with a layer of stone granules. This design provides the appearance of traditional shingles or shakes while leveraging the strength and longevity of metal.
Key Components
- Steel Core: Provides structural support, wind resistance, and impact protection.
- Primer Layer: Enhances corrosion resistance and adhesion for the stone coating.
- Stone-Coated Surface: Offers aesthetic texture, UV protection, and additional weather resistance.
These materials combine to create a roofing system that is lightweight, fire-resistant, and extremely durable. For premium stone-coated metal roof tile options, visit ROOFGLORY.com.
Advantages of Stone-Coated Metal Roof Tiles
Before diving into installation, it’s important to understand why these tiles are favored:
- Longevity: Typically last 50–70 years, far surpassing asphalt shingles or wood shakes.
- Durability: Resistant to wind, hail, heavy rain, and extreme temperatures.
- Aesthetic Appeal: Mimics wood, clay, or slate while offering multiple colors and profiles.
- Energy Efficiency: Reflects heat and can lower energy costs for commercial buildings.
- Fire Resistance: Class A fire rating enhances safety for industrial or urban areas.
Pre-Installation Preparation
Proper preparation is essential for a successful installation:
1. Roof Inspection
- Inspect the existing roof deck for structural integrity.
- Remove any damaged or rotten material.
- Ensure the deck is level and clean to support the metal tiles.
2. Material Inspection
- Verify that stone-coated metal tiles are free from defects or damages.
- Check that underlayment, fasteners, ridge caps, and flashings are included.
3. Safety Measures
- Install scaffolding and roof anchors.
- Equip workers with safety harnesses and helmets.
- Plan for safe handling of heavy tiles and stone-coated surfaces.

Installation Tools and Materials
Typical tools required for installation include:
- Measuring tape, chalk line, and straight edge
- Power drill, screw gun, and impact driver
- Roofing nails or screws with rubber washers
- Ridge caps, flashings, and valley liners
- Safety equipment: gloves, harnesses, helmets
Materials typically include:
- Stone-coated metal roof tiles (from ROOFGLORY or equivalent)
- Waterproof underlayment
- Fasteners, ridge caps, and flashing components
Step-by-Step Installation Process
Step 1: Install Underlayment
- Apply waterproof underlayment across the entire roof deck.
- Ensure proper overlap and secure attachment to prevent water infiltration.
- Consider using insulated underlayment for energy efficiency.
Step 2: Lay Starter Strips
- Install starter strips along the eaves to provide a base for the first row of tiles.
- Ensure they are aligned properly to maintain uniformity.
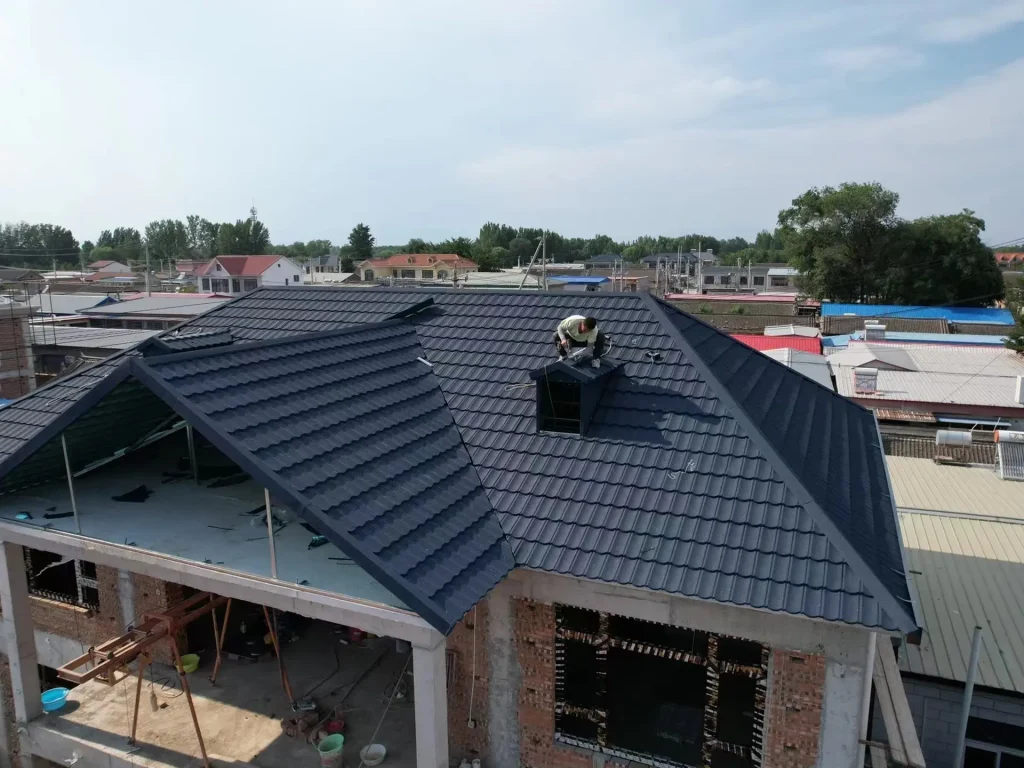
Step 3: Install Stone-Coated Metal Tiles
- Begin at the bottom edge of the roof and work upward.
- Align each tile with the starter strip and adjacent tiles.
- Fasten tiles using recommended screws or nails, ensuring waterproofing at each joint.
- Maintain consistent spacing for proper interlocking and aesthetics.
Step 4: Install Flashing and Ridge Caps
- Install flashing at valleys, chimneys, vents, and edges to prevent leaks.
- Apply ridge caps along roof peaks to seal the top of the roofing system.
- Ensure all flashings are properly aligned and sealed.
Step 5: Final Inspection
- Check all tiles for secure fastening and proper alignment.
- Verify that flashings and ridge caps are correctly installed.
- Remove any debris from the roof surface.
For professional guidance and product recommendations, visit ROOFGLORY.com.
Common Installation Challenges
Even with premium products, installers may encounter challenges:
- Improper Deck Preparation: Can lead to leaks or uneven surfaces.
- Misaligned Tiles: Affects aesthetics and interlocking strength.
- Inadequate Flashing: Leads to water penetration and potential roof damage.
- Weather Conditions: Rain, snow, or extreme heat can complicate installation.
Proper planning, adherence to manufacturer guidelines, and professional installation mitigate these risks.

Maintenance After Installation
Stone-coated metal roof tiles require minimal maintenance, but periodic inspection is recommended:
- Check for loose or damaged tiles after storms
- Clean gutters and downspouts regularly
- Inspect flashings and ridge caps for potential leaks
- Remove debris and moss growth to prevent damage
Regular maintenance ensures maximum lifespan and performance.
Cost Considerations
Stone-coated metal roof tile installation involves several cost components:
- Materials: USD 8–15 per sq. ft. depending on profile and coating
- Labor: USD 6–12 per sq. ft., influenced by roof complexity
- Additional Components: Flashing, ridge caps, underlayment, and fasteners
Although the initial investment is higher than asphalt or basic metal panels, the long lifespan, energy savings, and low maintenance make it a cost-effective solution for commercial properties.
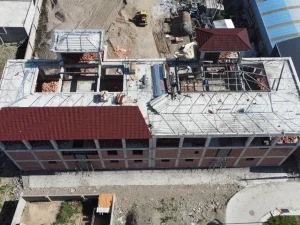
Case Studies
- Commercial Office Complex in Linyi, China
- Installed ROOFGLORY stone-coated metal tiles for 5,000 sq. ft. roof
- Achieved superior weather resistance and energy efficiency
- Maintenance costs reduced by 70% compared to traditional asphalt
- Hotel Project in Southeast Asia
- Stone-coated metal roof enhanced the aesthetic appeal
- Provided fire resistance and improved guest safety
- ROI realized through energy cost reduction and long-term durability
Conclusion
Proper stone-coated metal roof tile installation is essential for ensuring longevity, durability, and aesthetic performance. By adhering to manufacturer guidelines, preparing the roof deck, and using high-quality materials like ROOFGLORY stone-coated metal tiles, businesses can achieve a roofing solution that lasts decades, reduces maintenance costs, and enhances property value.
For professional consultation, installation guidance, and product selection, visit ROOFGLORY.com today.
FAQ
1. How long do stone-coated metal roof tiles last?
Typically 50–70 years with proper installation and maintenance.
2. Can stone-coated metal tiles be installed over an existing roof?
Yes, with appropriate underlayment and structural assessment.
3. Are they suitable for commercial buildings?
Absolutely. They are ideal for offices, hotels, retail, and industrial facilities.
4. What maintenance is required after installation?
Minimal; periodic inspections, cleaning gutters, and checking flashings.
5. Where can I get professional installation support?
Visit ROOFGLORY.com for consultation and installation services.