Even the most durable roofing systems may occasionally require attention due to impact damage, severe weather events, or isolated material issues. For building professionals, facility managers, and property owners, understanding how to properly replace individual interlocking roof tiles is essential for maintaining the long-term performance and weather integrity of the entire roofing system. Unlike traditional roofing materials that may require extensive section replacements, the modular design of interlocking roof tiles offers the significant advantage of targeted, efficient repairs.
ROOFGLORY interlocking roof tiles, precision-engineered at our manufacturing facility in Linyi, Shandong, China, are designed with repairability as a core consideration. The interlocking mechanism that provides exceptional weather resistance and wind performance also facilitates straightforward replacement when individual tiles become damaged. This comprehensive guide provides building professionals with the technical knowledge and practical procedures necessary to execute successful tile replacements, preserving the longevity and performance of the roofing investment.
Understanding the Interlocking System
Before attempting any repair, a thorough understanding of how interlocking roof tiles function as an integrated system is essential. The interlocking design creates a continuous, weather-resistant membrane through mechanical engagement between adjacent tiles.
The Interlocking Mechanism
Interlocking roof tiles feature precision-engineered connection points along their edges that create positive engagement with neighboring tiles. These connections serve multiple purposes:
-
Weather Sealing: The overlapping interlock creates a labyrinth path that prevents water infiltration while allowing for thermal movement
-
Wind Resistance: Mechanical engagement distributes wind uplift forces across multiple tiles, preventing individual dislodgement
-
Alignment Guidance: The interlock ensures consistent spacing and alignment across the entire roof surface
-
Load Distribution: Connections transfer snow and live loads to the supporting structure through the integrated assembly
System Integration
The interlocking tile system includes several component types that work together:
-
Field Tiles: The standard tiles covering the majority of the roof area
-
Starter Tiles: Specialized tiles installed at the eaves to establish the first course
-
Ridge and Hip Tiles: Components that cap the ridges and hips, providing weather protection at these critical junctions
-
Valley Flashing: Metal flashings that manage water flow in roof valleys
-
Penetration Flashings: Specialized flashings around chimneys, vents, and other roof penetrations
Understanding how these components interact is crucial for planning and executing successful tile replacements.
When Replacement Becomes Necessary
Recognizing situations that warrant tile replacement helps building professionals make appropriate repair decisions and communicate effectively with clients.
Common Causes of Tile Damage
Impact Damage: Hailstones, falling branches, or debris during severe weather can crack, fracture, or dislodge individual tiles. The stone coating provides significant impact resistance, but extreme events may still cause localized damage.
Manufacturing Defects: While rare with quality products like ROOFGLORY tiles, isolated manufacturing irregularities may occasionally necessitate replacement of individual units.
Installation Errors: Improperly secured tiles during original installation may become loose over time, requiring resecuring or replacement.
Foot Traffic Damage: Maintenance access to rooftop equipment, if not properly managed, can occasionally result in cracked or dislodged tiles.
Severe Weather Events: Extreme wind events may occasionally lift or shift individual tiles, compromising their proper engagement with adjacent units.
Signs That Replacement Is Needed
Visual indicators that a tile requires attention include:
-
Visible cracks or fractures in the tile surface
-
Tiles that appear lifted, tilted, or misaligned compared to surrounding units
-
Missing tiles creating visible gaps in the roof covering
-
Granule loss exposing the underlying substrate in concentrated areas
-
Evidence of water infiltration beneath or around a specific tile
-
Tiles that move or rattle when gently pressed
Safety Considerations for Roof Work
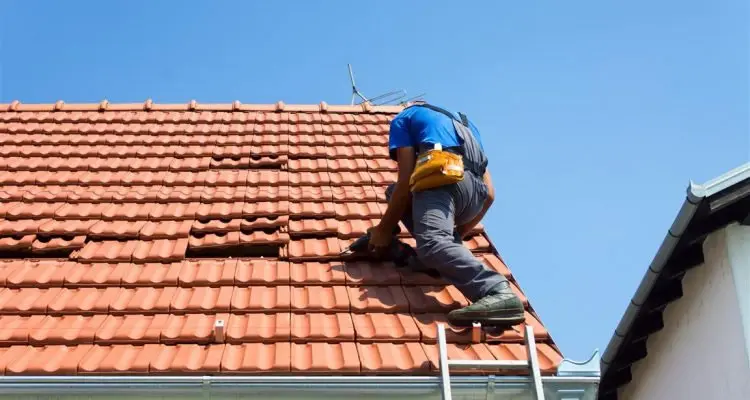
Working on any roof presents inherent hazards that require appropriate safety protocols. Before attempting tile replacement, ensure all necessary precautions are in place.
Personal Protective Equipment
-
Fall Protection: Appropriate harness systems with secure anchor points when working on slopes or at heights
-
Footwear: Non-slip shoes with good traction for roof surfaces
-
Eye Protection: Safety glasses to protect against debris during tile removal
-
Gloves: Heavy-duty work gloves to protect hands from sharp edges
-
Head Protection: Hard hats when working below others on the roof or in windy conditions
Weather Considerations
-
Avoid working on wet, icy, or excessively windy days
-
Schedule repairs during favorable weather conditions
-
Ensure adequate daylight for safe work
Ladder Safety
-
Use appropriately sized ladders rated for the weight they will support
-
Ensure ladders are on stable, level ground
-
Secure ladders at the top to prevent movement
-
Maintain three points of contact when climbing
Tools and Materials Required
Proper preparation with the right tools ensures efficient and successful tile replacement.
Essential Tools
-
Flat Bar or Pry Bar: For gently lifting adjacent tiles to access fasteners
-
Hammer: For driving fasteners and gentle tapping to seat tiles
-
Screwdriver or Drill: Appropriate for the fastener type used in the installation
-
Tin Snips: For cutting metal if any trimming is required
-
Utility Knife: For cutting underlayment if necessary
-
Magnet: For retrieving dropped fasteners
-
Chalk Line: For maintaining alignment if multiple tiles are being replaced
-
Measuring Tape: For verifying positioning
-
Safety Equipment: As detailed above
Replacement Materials
-
Matching Replacement Tiles: Identical to the existing tiles in profile, color, and dimensions. ROOFGLORY recommends sourcing replacement tiles from the same production batch when possible for optimal color matching.
-
Appropriate Fasteners: Corrosion-resistant fasteners matching the original installation specifications. Using incorrect fasteners can compromise performance and warranty coverage.
-
Manufacturer-Approved Sealant: For any applications requiring supplemental sealing
-
Touch-Up Paint: Manufacturer-approved paint for any incidental scratches on adjacent tiles
Step-by-Step Replacement Procedure
The following procedure outlines the general approach for replacing individual interlocking roof tiles. Specific techniques may vary slightly based on the exact profile and installation method of your ROOFGLORY system.
Step 1: Assessment and Preparation
Begin by carefully examining the damaged area to understand the full extent of the repair needed. Identify which specific tiles require replacement and note how they interlock with surrounding tiles. Photograph the area for reference before beginning work.
Check the condition of the underlayment beneath the damaged tile. If the underlayment has been compromised, this must be addressed during the repair process.
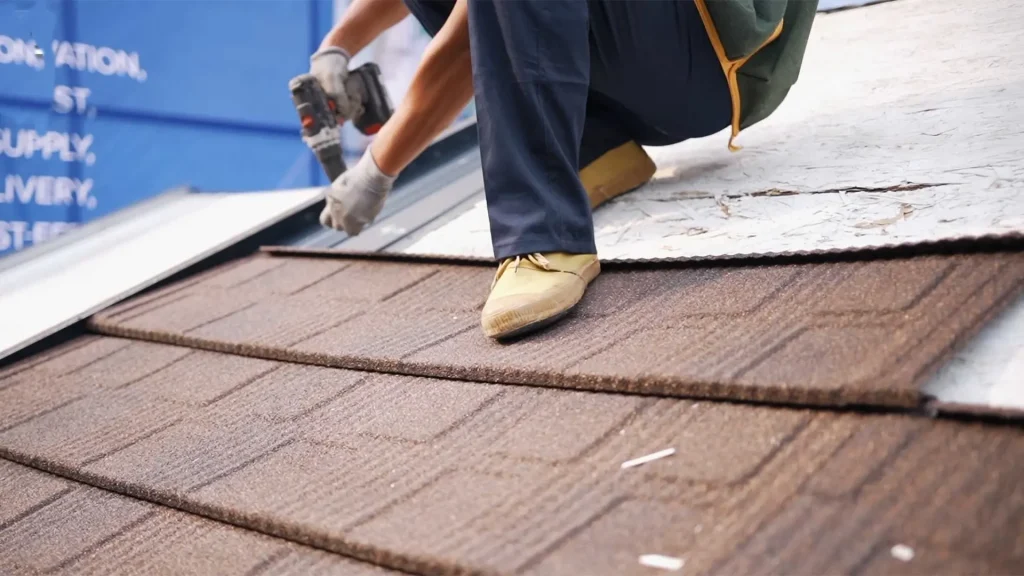
Step 2: Accessing the Damaged Tile
Interlocking tiles are secured to the roof deck and to each other through their connection points. Accessing a specific tile typically requires gently lifting the tiles above and to the sides to reach the fasteners.
Starting from the course above the damaged tile, carefully insert a flat bar beneath the overlapping edge of the tile. Apply gentle, even pressure to lift the tile just enough to access the fasteners of the damaged tile below. Work slowly and carefully to avoid cracking or damaging the adjacent tiles.
For tiles in the middle of a roof section, you may need to temporarily remove tiles from above to create access to the damaged unit. This sequential disassembly should be approached methodically, keeping track of the order of removal for later reassembly.
Step 3: Removing the Damaged Tile
Once you have accessed the fasteners securing the damaged tile, remove them using the appropriate tool—typically a screwdriver for exposed fasteners or a pry bar for clipped installations. With the fasteners removed, the tile should be free from its attachment to the roof deck.
However, the tile remains engaged with its neighbors through the interlocking side connections. Carefully slide the tile sideways to disengage these interlocks. This may require gently lifting or manipulating adjacent tiles to create enough clearance.
Remove the damaged tile from the roof surface and set it aside for disposal.
Step 4: Inspecting and Preparing the Area
With the damaged tile removed, thoroughly inspect the exposed area:
-
Underlayment Condition: Check for any damage, tears, or deterioration. If the underlayment is compromised, repair it with compatible materials, ensuring proper overlap and sealing.
-
Roof Deck Integrity: Verify that the underlying roof deck is sound and free from rot or damage.
-
Adjacent Tiles: Inspect the interlocking edges of surrounding tiles for any damage that might affect the fit of the replacement.
-
Fastener Holes: Note the location of existing fastener holes for reference during reinstallation.
Clean any debris from the area to ensure a clean surface for the replacement tile.
Step 5: Installing the Replacement Tile
Position the replacement tile in approximately the correct location, then slide it sideways to engage the side interlock with the adjacent tile. The engagement should feel positive and the tile should align properly with its neighbors.
With the tile positioned, verify alignment:
-
The tile should be parallel to the eaves and ridge
-
The bottom edge should align with other tiles in the same course
-
The side edges should align properly with adjacent tiles
-
The tile should sit flat against the roof deck
Once alignment is confirmed, secure the tile using the appropriate fasteners installed at the locations specified in the manufacturer’s installation guidelines. For ROOFGLORY tiles, this typically means fastening through the pre-punched holes or at the designated fastening points.
Drive fasteners to the correct depth—snug enough to hold securely but not so tight as to deform the tile or restrict thermal movement.
Step 6: Reassembling Removed Tiles
If you removed tiles from above to access the damaged unit, reverse the disassembly process to reinstall them. Ensure each tile engages properly with its neighbors before fastening. Verify alignment as you progress.
Step 7: Final Inspection
After completing the replacement, conduct a thorough inspection of the repaired area:
-
Verify that all replaced and reinstalled tiles are properly aligned and seated
-
Confirm that all fasteners are installed at the correct locations and depth
-
Check that interlocking connections are fully engaged
-
Inspect from ground level (with binoculars) to ensure the repair blends visually with surrounding areas
-
Clean up any debris, dropped fasteners, or tools from the roof surface
Step 8: Documentation
For professional applications, document the repair with photographs and notes. This documentation can be valuable for warranty purposes, future maintenance planning, and client communication.
Special Considerations for Different Roof Areas
Ridge and Hip Tile Replacement
Replacing ridge or hip tiles follows similar principles but requires additional attention to weather sealing at these critical junctions. Ridge and hip tiles typically have specialized profiles and may incorporate mechanical fasteners supplemented by manufacturer-approved sealants. When replacing these components, ensure that the new sealant application matches the original installation specifications.
Valley Area Repairs
Tiles adjacent to valleys require careful attention to maintain proper water flow. When replacing tiles in valley areas, verify that the replacement tile maintains the required clearance from the valley centerline and that any valley flashing remains properly positioned.
Penetration Flashings
If the damaged tile is near a roof penetration, inspect the penetration flashing carefully during the repair. Ensure that the replacement tile integrates properly with the flashing and that no gaps are introduced that could allow water entry.
When to Engage Professional Installers
While individual tile replacement is within the capabilities of many experienced building professionals, certain situations warrant engaging specialized installers:
-
Extensive Damage: When multiple tiles require replacement or damage is widespread
-
Complex Roof Geometries: Roofs with multiple valleys, hips, or complex intersecting planes
-
Steep Slopes: Roofs with pitches exceeding manufacturer recommendations for safe unassisted access
-
Warranty Considerations: If the roof is under warranty, verify that self-performed repairs will not void coverage
-
Unfamiliar Systems: When working with an interlocking system you have not previously installed
ROOFGLORY maintains networks of trained installers familiar with our systems who can provide professional repair services when needed.
Preventing Future Damage
After completing repairs, consider measures to reduce the likelihood of future damage requiring additional replacements.
Tree Management
If overhanging branches contributed to the damage, trim them back to reduce future risk. Maintain clearance between trees and the roof surface to minimize debris accumulation and branch impact potential.
Regular Inspections
Implement a schedule of semi-annual inspections to identify and address minor issues before they escalate. Early detection of loose or damaged tiles allows for simpler, less expensive repairs.
Professional Maintenance
Consider engaging qualified roofing professionals for periodic comprehensive inspections, particularly for large or complex commercial roofs where access and safety considerations are significant.
Conclusion: Preserving Roof Performance Through Strategic Repairs
The ability to replace individual interlocking roof tiles represents one of the most valuable features of these advanced roofing systems. Unlike monolithic roofing materials that may require extensive section replacement when damage occurs, the modular design of interlocking tiles enables targeted, efficient repairs that preserve the integrity of the surrounding roof.
For building professionals, mastering tile replacement techniques ensures that minor damage does not escalate into major issues, protecting both the roof’s performance and the client’s investment. By combining proper procedures, appropriate safety protocols, and quality replacement materials from trusted manufacturers like ROOFGLORY, repair operations can restore full functionality while maintaining the aesthetic coherence of the roofing system.
ROOFGLORY supports building professionals with comprehensive technical resources, quality replacement materials, and expert guidance for all aspects of roof maintenance and repair. Our commitment to manufacturing excellence extends throughout the product lifecycle, ensuring that our interlocking roof tiles deliver exceptional performance from installation through decades of reliable service.
For detailed installation guides, replacement tile sourcing, or to connect with certified ROOFGLORY installers, we invite you to contact our technical team.
Access ROOFGLORY technical resources and support:
-
Installation and Maintenance Guides: Download comprehensive documentation for all ROOFGLORY interlocking tile systems.
-
Replacement Tile Sourcing: Contact our team to obtain matching replacement tiles for your specific project.
-
Warranty Information: Review warranty coverage and requirements for maintaining coverage through repairs.
-
Product Specifications: Access detailed information on all ROOFGLORY interlocking roof tile profiles and systems.