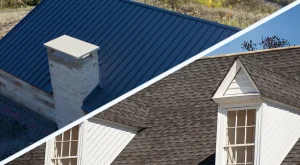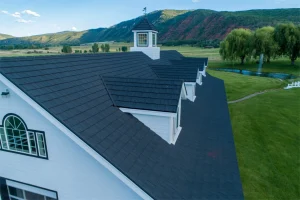
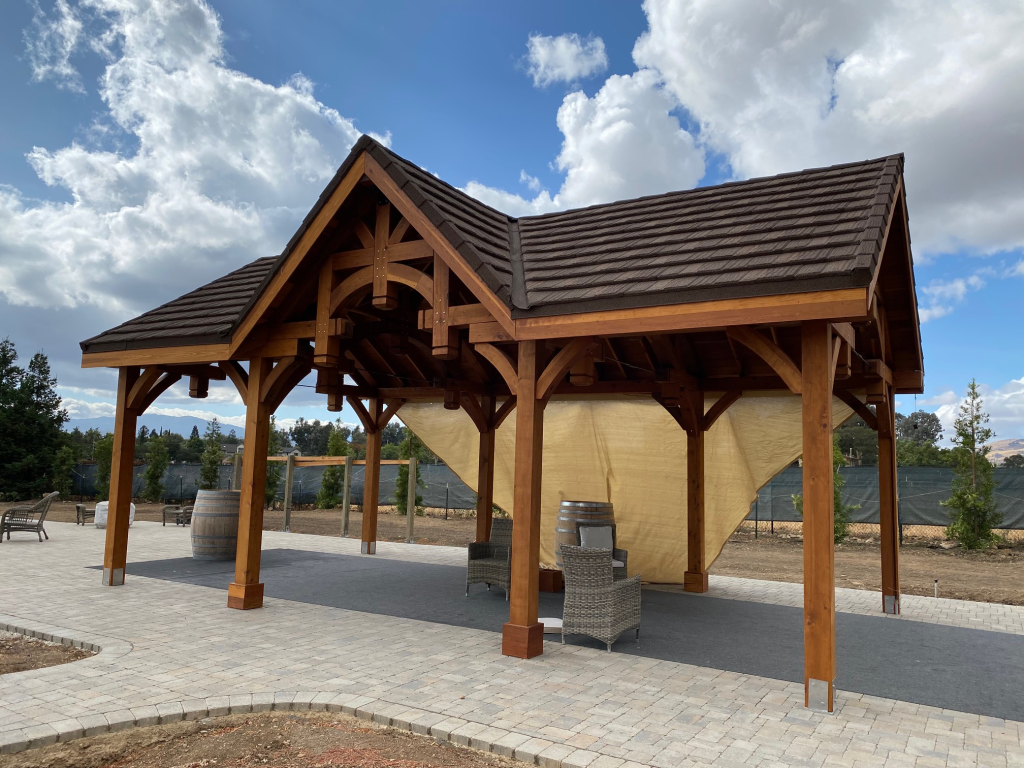
Stone coated steel roofing combines the structural strength of steel with a textured stone-coated finish and the appearance of traditional roofing materials. However, the quality of a finished roof depends on more than the roofing panels themselves. Proper roof preparation, underlayment, panel layout, fastening, flashing, and finishing details all play important roles in the overall installation.
For roofing contractors, builders, importers, and distributors, understanding the stone coated steel roofing installation process is essential before placing an order or starting a project. A clear understanding of the installation requirements can help reduce material waste, avoid unnecessary delays, and ensure that the roofing system is compatible with the building design and local conditions.
At ROOFGLORY, we manufacture stone coated steel roofing profiles for residential, villa, commercial, and other architectural projects. We work with buyers who need to evaluate roofing styles, product specifications, accessories, and project requirements before purchasing. This article explains the key considerations involved in installing stone coated steel roofing and what buyers should confirm before moving forward.
1. What Should Be Prepared Before Installing Stone Coated Steel Roofing?
A successful stone coated metal roofing installation starts before the first roofing panel is placed. The roof structure, surface condition, drainage design, and installation method should be reviewed in advance.
Inspect the Roof Structure
Before installing stone coated steel roofing, the contractor should confirm that the roof framing and supporting structure are suitable for the selected roofing system. The roof deck or batten structure must be properly aligned, securely fixed, and prepared to support the roofing materials.
Uneven roof surfaces can affect panel alignment, create visible irregularities, and complicate the installation of ridge caps, hip tiles, and flashing. Any structural or substrate problems should be addressed before roofing work begins.
Confirm the Roof Pitch
Roof pitch is an important factor when selecting and installing stone coated steel roof tiles. Different profiles and installation systems may have different minimum slope requirements.
A roof with a relatively low pitch may require a specific underlayment arrangement or installation detail to manage water drainage. Buyers should not assume that every stone coated metal roofing profile can be installed on the same roof slope.
Before purchasing, confirm:
- The roof pitch and dimensions
- The selected roofing profile
- The manufacturer’s minimum pitch requirements
- Whether the project requires additional waterproofing measures
- Applicable local building codes
Plan the Roofing Layout
Roof dimensions, hips, valleys, ridges, dormers, and roof penetrations all affect panel layout and material requirements.
Contractors should prepare a roof plan to determine the starting point, panel direction, course alignment, cutting requirements, and finishing details. A well-planned layout helps maintain a consistent appearance while reducing unnecessary cutting and material waste.
For importers and project buyers, providing roof drawings or detailed dimensions to the supplier before ordering can also improve the accuracy of material estimates.
2. Underlayment and Roof Deck Preparation
Underlayment is an important component of the roofing assembly. Although stone coated steel panels form the visible exterior roofing layer, the layers beneath them contribute to moisture management and the protection of the roof structure.
The appropriate underlayment depends on the roof design, climate, local building requirements, and the installation system.
Prepare a Clean and Stable Substrate
Before laying the underlayment, the roof surface should be inspected for debris, protruding nails, damaged decking, uneven areas, and other conditions that may interfere with installation.
A stable, properly prepared substrate helps prevent problems during panel installation and provides a consistent base for the roofing system.
Select the Appropriate Underlayment
Roofing projects may use different types of underlayment depending on their requirements, including asphalt-based materials and synthetic roofing membranes.
Areas that are more vulnerable to water accumulation, such as eaves, valleys, roof intersections, and certain penetrations, may require additional waterproofing protection according to the project specifications.
In regions with heavy rainfall, snow, freeze-thaw conditions, or high humidity, underlayment selection deserves particular attention.
Coordinate Underlayment with the Roofing System
The underlayment should be compatible with the selected stone coated steel roofing system and installed according to the relevant instructions.
Contractors should confirm the required overlap, fastening method, treatment of roof edges, and any additional waterproofing details before proceeding.
A roof is a complete assembly rather than a single material. The roofing panels, underlayment, flashing, fasteners, and supporting structure should all work together.

3. How to Install Stone Coated Metal Roofing
The exact installation process varies between direct-to-deck systems, batten-based systems, panel designs, and manufacturers. However, most installations follow a similar sequence of preparation, layout, panel placement, fastening, and finishing.
Step 1: Install the Necessary Roof Edge Components
Roof edge details are normally prepared before the main roofing panels are installed. Depending on the roofing system, these may include eave flashing, starter components, drip edges, fascia details, and other perimeter accessories.
These components help create a consistent starting line for the roofing panels and coordinate the roof covering with gutters and other drainage elements.
The installation team should verify that the edge components are positioned correctly and that the roofing layout accounts for the intended panel exposure and overlap.
Step 2: Establish the Starting Point and Alignment
The installer should establish a reference line for the first course of panels. Proper alignment at the beginning of the installation is important because small deviations can become more noticeable as additional rows are installed.
The starting side and panel direction should follow the installation instructions for the selected profile. Contractors should also plan the arrangement of panels around roof edges, valleys, hips, and other complex areas.
Step 3: Install the First Course of Roofing Panels
The first course is particularly important because it establishes the alignment for the rest of the roof.
Panels should be positioned according to the specified overlap and interlocking details. The installer should verify that the panels are correctly seated, aligned with the roof edge, and secured using the approved fastening method.
Incorrect positioning in the first course may lead to uneven rows, inconsistent exposures, and unnecessary adjustments later in the installation.
Step 4: Continue Installing Subsequent Courses
Once the first course has been properly installed, the remaining panels can be placed progressively across the roof.
During this process, installers should pay attention to:
- Consistent panel alignment
- Correct overlap between panels
- Proper interlocking of adjacent sections
- Fastener location and installation
- Avoiding damage to the stone-coated surface
- Maintaining a clean working area
Some systems require a specific installation sequence or staggered panel arrangement. Contractors should follow the manufacturer’s instructions rather than applying the same method to every stone coated roofing profile.
Step 5: Cut and Fit Panels Around Roof Features
Roof features such as valleys, dormers, chimneys, skylights, walls, and pipe penetrations often require customized panel cuts and additional detailing.
These areas need careful measurement and fitting to maintain a clean appearance and support effective water drainage. Poorly planned cuts can lead to excessive material waste, difficult fitting, and problems with the surrounding flashing.
Contractors should identify these areas during the planning stage rather than treating them as unexpected problems after the main panels have been installed.
Step 6: Complete the Ridge, Hip, and Roof Edge Details
After the main roofing panels are installed, the roof’s finishing components can be completed according to the system design.
Common finishing components include ridge caps, hip caps, gable or rake trims, eave components, and other profile-specific accessories.
These components contribute to the finished appearance of the roof while helping protect exposed joints and transitions. Their installation should be coordinated with the roofing panels to ensure proper alignment, fastening, and coverage.
4. Flashing and Waterproofing: Where Installation Quality Matters Most
Many roofing problems are associated with transitions and penetrations rather than the main roof surface. This makes flashing installation one of the most important parts of stone coated steel roofing construction.
Roof Valleys
Valleys collect and direct water from adjoining roof slopes. The valley design, flashing dimensions, panel cuts, and drainage path should be planned carefully.
The roofing panels must be fitted around the valley without obstructing the water channel. Flashing and underlayment details should follow the selected roofing system’s requirements.
Roof-to-Wall Connections
Where a roof meets a vertical wall, flashing is needed to manage the transition between the roofing surface and the wall.
Depending on the design, these details may involve sidewall flashing, step flashing, apron flashing, or counter flashing. The correct arrangement depends on the building design and the materials involved.
Chimneys, Skylights, and Pipes
Roof penetrations interrupt the continuous roofing surface and require appropriate flashing systems.
Installers should confirm that the penetration details are compatible with the roof profile and that the surrounding panels are correctly fitted. Sealants should be used only where specified as part of the system, not as a substitute for properly designed flashing.
For project buyers, it is worth confirming in advance which accessories are included in the roofing order and which components need to be sourced separately.
5. Common Stone Coated Steel Roofing Installation Mistakes
Stone coated steel roofing can be used across a range of roof designs, but poor planning and workmanship can create unnecessary installation problems.
Incorrect Fastener Selection
Fasteners must be compatible with the roofing system, supporting structure, exposure conditions, and local requirements.
Using unsuitable fasteners may affect attachment performance or introduce corrosion concerns. Buyers and contractors should confirm fastener specifications, lengths, materials, and locations before installation.
Improper Fastening
Incorrect fastening can occur when screws or nails are placed in the wrong locations, driven at the wrong angle, or installed with excessive or insufficient force.
Fasteners should be installed according to the product-specific instructions. Contractors should avoid improvising fastening patterns without confirming that the alternative method is approved for the roofing system.
Poor Panel Alignment
Uneven panel alignment may result from inaccurate measurements, an inconsistent starting line, or failure to check the layout during installation.
Once several courses have been installed, correcting alignment can become more time-consuming. Frequent checks during the early stages can help prevent this problem from spreading across the roof.
Inadequate Flashing Details
Incomplete flashing around roof valleys, walls, chimneys, and pipes can create water-management problems.
These areas should receive sufficient attention during planning and installation. A visually complete roof does not necessarily mean that every transition has been properly detailed.
Damage to the Stone-Coated Surface
Panels may be scratched or chipped during transportation, handling, cutting, or installation.
Roofing materials should be handled carefully, and installers should use appropriate tools and working methods. Metal debris should be removed from the roof after cutting to reduce the risk of staining or surface damage.
Where minor finish damage occurs, repairs should follow the product manufacturer’s recommended touch-up procedure.
6. How Much Does Stone Coated Steel Roofing Installation Cost?
The cost of stone coated metal roofing installation varies considerably from one project to another. Buyers comparing installation costs should distinguish between the price of roofing materials and the total cost of completing the roof.
The final installation budget may include roofing panels, underlayment, flashing, fasteners, ridge and hip components, labor, transportation, roof preparation, waste, and additional waterproofing requirements.
Roof Complexity
A simple roof with large uninterrupted slopes is generally easier to measure and install than a roof with numerous valleys, dormers, hips, skylights, and penetrations.
Complex roof geometry increases measuring, cutting, fitting, and finishing work. It may also increase material waste and labor time.
Installation Method
Different stone coated steel roofing systems may use different supporting structures and installation methods.
Direct-to-deck installation and batten-based systems may require different materials, labor, and preparation. Buyers should compare complete system requirements rather than considering only the price per roofing panel.
Local Labor Rates
Installation labor costs depend on the location, contractor experience, roof access, building height, project schedule, and local market conditions.
A factory quotation for stone coated metal roofing does not represent the total installed cost of a roof in the destination market.
For a more detailed breakdown of material pricing and quotation factors, see our article on Stone Coated Steel Roofing Price and Mediterranean Roofing Options.

7. What Should Buyers Confirm Before Ordering Stone Coated Steel Roofing?
For importers, wholesalers, contractors, and developers, installation compatibility should be considered before the purchase order is finalized.
Ordering the correct roofing profile is only the first step. The roofing materials must also match the roof design, installation method, local climate, and project requirements.
Before placing an order, buyers should confirm:
Roof measurements and project drawings: Provide the roof dimensions, pitch, roof shape, and major details to help estimate panel quantities and accessory requirements.
Profile and appearance: Select a roofing profile that matches the architectural design, whether the project requires a tile appearance, shingle-style roofing, or a wood-shake look.
Installation system: Confirm whether the product is designed for a direct-to-deck or batten-based installation and whether the supporting materials are available in the destination market.
Accessories and trims: Review the requirements for ridge caps, hip caps, flashing, starter components, gable trims, and other finishing materials.
Technical documentation: Request the relevant product specifications, installation instructions, packaging information, and other documentation required by the project.
Packing and shipping: For international orders, consider panel protection, packaging configuration, container loading, accessory organization, and handling requirements to reduce the risk of damage during transportation.
These checks can help buyers avoid ordering a product that looks suitable in a catalog but creates difficulties during installation.
8. Choosing a Stone Coated Steel Roofing Manufacturer for Your Project
For international roofing buyers, the manufacturer’s role extends beyond supplying panels. A reliable sourcing process requires clear product information, consistent communication, and the ability to coordinate product specifications with the buyer’s project needs.
ROOFGLORY supplies stone coated steel roofing products for overseas markets, including tile-style, shingle-style, and shake-style profiles.
Our product range includes:
- Villa Tile: A barrel-style profile inspired by traditional clay roofing.
- Tile: A scalloped profile with a Mediterranean-style appearance.
- Shingle XD: A thicker-cut shingle-style design.
- Shake XD: A traditional hand-split wood-shake appearance.
- Shake: A cedar-shake-inspired roofing profile.
For distributors and contractors, having different profile options makes it easier to serve residential, villa, renovation, and architectural markets with different appearance requirements.
When evaluating a supplier, buyers should discuss product specifications, roof profile selection, order quantity, packaging, accessories, and project documentation before confirming the order. Clear communication at the quotation stage can help minimize misunderstandings between the factory, importer, contractor, and end customer.
You can explore the ROOFGLORY stone coated steel roofing products to review available roofing styles and discuss your project requirements.
Final Thoughts
Stone coated steel roofing installation requires more than placing panels across a roof. Proper preparation, accurate layout, compatible underlayment, correct fastening, careful flashing, and attention to finishing details all contribute to a successful roofing project.
For contractors, installation planning helps reduce avoidable problems on site. For importers and distributors, understanding these requirements helps evaluate products more accurately and communicate with customers more confidently.
If you are sourcing stone coated steel roofing for a residential, villa, commercial, or distribution project, ROOFGLORY can help you review available profiles and discuss the roofing products required for your market.
Contact ROOFGLORY to discuss your roofing project, product selection, and wholesale requirements.